Menus
Menus in WPtouch Pro 4.x
WPtouch Pro allows extensive customization of the menus used in your mobile theme. Access individual menu settings for your WPtouch Pro theme in Settings > Menus in the WPtouch Pro admin panel.
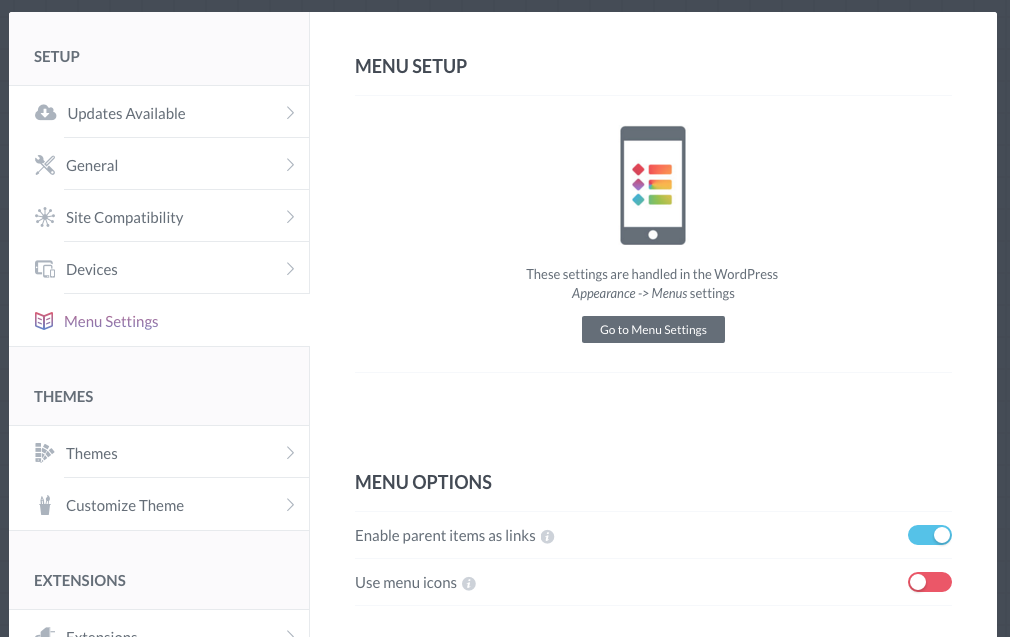
To assign custom WordPress menus to WPtouch Pro and assign icons to its menu items, click on the "Go to Menu Settings" button or go directly to Appearance > Menus in WordPress. To add menu icons, make sure "Use menu icons" is enabled in the Menu Settings page.
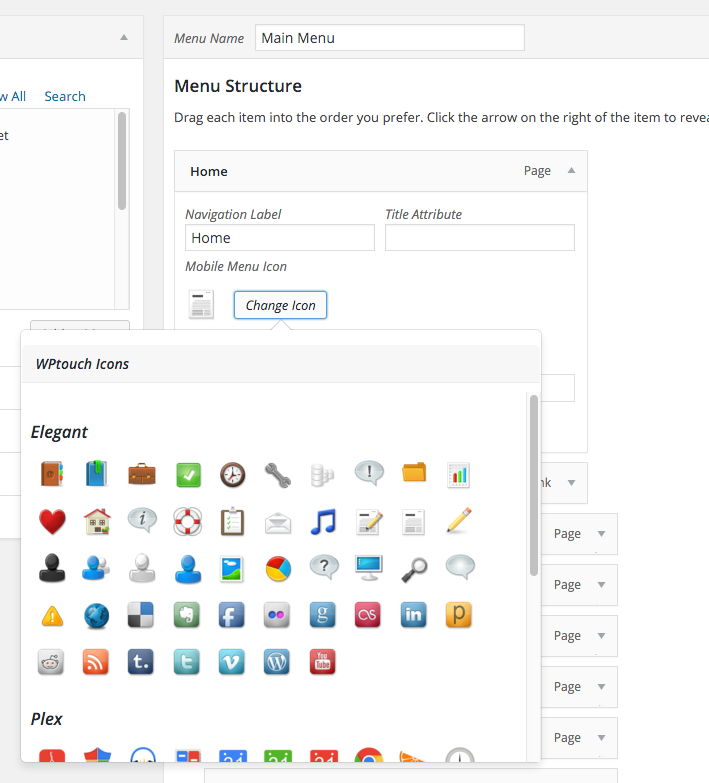
To add a custom icon to a menu item, expand the menu item. Click on the "Change Icon" button and select the icon you want to use for the menu item. Installation of icon sets can be done in Settings > Menu Settings > Menu Options after enabling "Use menu icons".
To assign a menu to WPtouch Pro, scroll down and select the WPtouch Pro theme location. Save the changes and the menu should be assigned to your WPtouch Pro theme.
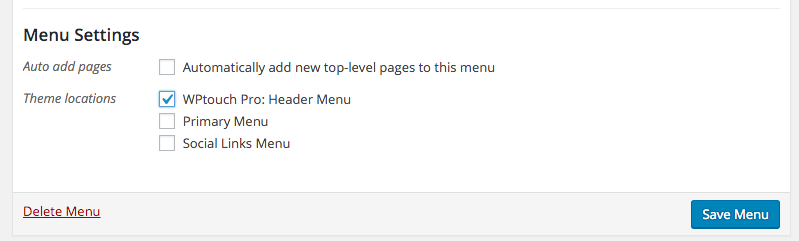
Menus can also be assigned in Appearance > Menus > Manage Locations. For a thorough explanation on creating custom WordPress menus please visit the following article at WordPress.org - https://codex.wordpress.org/WordPress_Menu_User_Guide
Menus in WPtouch Pro 3.x
WPtouch Pro allows extensive customization of the menus used in your mobile theme. Each mobile theme comes with its own set of menu options and styles. You may further customize each default menu with the options provided or with custom CSS. Menu options are not shared across themes.
Using a Custom WordPress Menu
With a custom menu you have full control of the items that appear in the menu of your mobile theme. Your menu can include posts, pages, categories, or custom URLs and display them in any order you like, including nesting menu items.- Create and name a custom WordPress menu in Appearance > Menus. (Additional information is available in the WordPress.org codex: http://codex.wordpress.org/WordPress_Menu_User_Guide).
- To use your custom WordPress menu in WPtouch Pro, go to Menus > Theme Menus and select your new custom menu for your primary or secondary mobile menu (if your active mobile theme offers multiple menus).
- Save your changes.
Theme Menu Options
Choose a Menu
Each theme offers the option to use a list of your WordPress pages as your mobile menu or to select one of your existing WordPress menus.
Menu Options
Some themes offer additional options such as multiple menus, a home page menu, or different menu styling."Enable parent items as links" allows you to enable or disable the active link on a menu item that has sub-items assigned.
"Use menu icons" allows you to remove all icons from your menu items leaving only plain text for each item.
Menu Setup
To customize the icons used in your mobile theme's menu, you may choose to use the icon sets available through the WPtouch Pro admin panel or upload custom icons.The Menu Setup admin panel displays the active menu(s) for your mobile theme on the left and the active icon set on the right. Active menus may be managed in the "Theme Menus" section. Active icon sets may be managed in the "Icon Upload & Sets" section.
To exclude an item from the active menu, disable it via the "Show/Hide" checkboxes.


- Change the default icon for all your non-customized icons at once. Once changed, the icon setting will remain as the new default. To revert the new default icon to its original setting, the WPtouch Pro settings must be reset.
- Reset any individual icon to the default icon.


Icon Upload & Sets
WPtouch Pro allows you to manage as many icons and sets of icons for use in your mobile theme as you like. You may choose from the selection of default icons sets made available through WPtouch Pro or upload your own custom icons.Icon Upload
The Icon Upload tool allows you to add custom icons to be used in your WPtouch Pro mobile theme menu(s). Icons must be in .png, .jpg, or .gif format and will be automatically resized for display.Uploaded Icons
Individual icon files that have been uploaded will appear in the "Uploaded Icons" area. Uploaded files are saved to your server. The specific location on your server will depend upon whether you have a single site WordPress installation or a WordPress network:- If you have a single WordPress installation, your icons will be saved in the directory located at /wp-content/wptouch-data/icons/custom/.
- If you have a WordPress network installation, your icons will be saved in the directory located at /wp-content/wptouch-data/YOUR_SUBSITE_ID/icons/custom/.
Icon Sets
WPtouch Pro makes hundreds of icons available for use in your mobile themes. Icon sets that are installed or that are available for download and installation are listed. To install additional icon sets from the available downloads, click the “Install” button next to the desired set. The icon set will then be automatically downloaded and installed.
Custom icon sets may be added to WPtouch Pro by creating a new directory on your server for each icon set desired:
- If you have a single WordPress installation, create your new directory inside /wp-content/wptouch-data/icons/.
- If you have a WordPress network installation, create your new directory inside /wp-content/wptouch-data/YOUR_SUBSITE_ID/icons/.


For your custom icon set to register with WPtouch Pro, it needs to contain a plain text file named "wptouch.info" with information about your custom set. At miminium, the file must include the name of the icon set and its author:
Name: My Icon Set #1
Author: Me
Description: My custom icons designed by me.
Background: Light
When successfully created, your custom icon set will be listed in the "Icon Sets" area of WPtouch Pro.
